Malzeme listesi :
10 adet kırmızı Led 5 mm
IC 4017
IC4060
Mercimek Kondansator (104) 100nF 50v
Resistör 47K
Resistör 10K
Resistör 220 R
jumper kablosu
10 lu kablo
Lehim teli
lehim pastası
Lehim havyası
9 Volt Pil
Pil bağlantısı
Devrenin Montajı
Vereceğim resimde ledlerin
 Bağlantısını Gösterir Şema
 Led in Anot uçlarının IC4017 entegresine bağlantısı ve kondansatör resistör ve enerji uçlarının bağlantısı nasıl olacak
elimizdeki Jumper telini entegrenin 8,13.15 nolu ayaklarına lehimlenecek 10K lık resistör entegrenin 13, 14 pinlerine lehimlenecek ondan sonra led in uçlarını entegrenin ayaklarına lehimlemeye başlayacağız
1 nolu ledin kablosunu ıc 4017 entegresinin 3 numaralı pinine lehimleyeceğiz
2 nolu ledin kablosunu ıc 4017 entegresinin 2 numaralı pinine lehimleyeceğiz
3 nolu ledin kablosunu ıc 4017 entegresinin 4 numaralı pinine lehimleyeceğiz.
4 nolu ledin kablosunu ıc 4017 entegresinin 7 numaralı pinine lehimleyeceğiz .
5 nolu ledin kablosunu ıc 4017 entegresinin 10 numaralı pinine lehimleyeceğiz.
6 nolu ledin kablosunu ıc 4017 entegresinin 1 numaralı pinine lehimleyeceğiz.
7 nolu ledin kablosunu ıc 4017 entegresinin 5numaralı pinine lehimleyeceğiz .
8 nolu ledin kablosunu ıc 4017 entegresinin 6 numaralı pinine lehimleyeceğiz.
9 nolu ledin kablosunu ıc 4017 entegresinin 9 numaralı pinine lehimleyeceğiz.
10 nolu ledin kablosunu ıc 4017 entegresinin 11 numaralı pinine lehimleyeceğiz.
Led
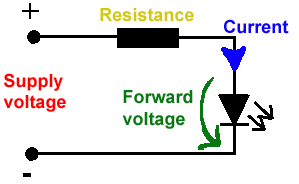
220 ohm direnç Ledlerin katot ortak uclarının bulunduğu jampır teline lehimlenecek ordan kablo ile IC4017 entegresinin 8 numaralı pinine lehimlenecek . 10K lık direnc 4017 entegresinin 14 numaralı bacağına lehimlenecek. Diğer ucu 8,13,15 noluayakları birleştiren jumper teline montelenecek
IC 4060 Entegresi pinlerin ayaklarını gösterir resim.
IC 4060 entegresinin IC 4017 entegresi ile birlikte çalışmasını gösterir anlatımı yapacağım.
IC 4060 entegresinin 8 numaralı pini ile 12 numaralı pinini kablo ile şöntliyeceğiz.
100 nF lik mercimek kondansatörümüzün bir ayağını IC 4060 entegresinin 9 numaralı pinine lehimliyeceğiz. 47 K lık resistör ü IC 4060 entegresinin 10 numaralı pinine lehimleyeceğiz.
IC 4060 entegresinin 11 numaralı pinine jumper kablosunun bir ucunu lehimleyeceğiz. kondansatörün ve resistörün uçları ile bu jumper kablosunu şöntleyeceğiz.
IC 4060 entegresinin 16 numaralı pini ile IC 4017 entegresinin 16 numaralı pinini birbirleri ile şöntleyeceğiz.
IC 4060 entegresinin 8 numaralı pini ve IC 4017 entegresinin 13 numaralı pinini kablo ile şöntleyeceğiz .pil bağlantı uçlarının siyah olanı IC 4060 entegresinin 8 numaralı pinine lehimleyeceğiz.
Kırmızı uçlu kabloyu da her iki entegrenin 16 ncı pinine lehimlenecek.
IC 4017 entegresinin 14 numaralı pini ile IC 4060 entegresinin 7 numaralı pini ile şöntleyeceğiz
bu şekildeki bağlantıda ledlerde ki yürüme şekli hızlı olur. eğer yavaş ilerlemesini istersek Ic 4060 entegresinin 7 numaralı bacağındaki şöntlemeyi kaldırıp o kabloyu entegrenin 6 numaralı bacağına şöntleyeceğiz . yaptığınız devreyi kontrol edebilmek için pil devresi arasına bir anahtar koyarsanız güzel bir şekilde bir kutu üstüne monteleyip bisikletinizde kullana bilirsiniz .
KOLAY GELSİN
 Bağlantısını Gösterir Şema
 Led in Anot uçlarının IC4017 entegresine bağlantısı ve kondansatör resistör ve enerji uçlarının bağlantısı nasıl olacak


Hiç yorum yok:
Yorum Gönder